Learn how to create intents yourself or add intents using an AI template.
There are two ways how you can add new intents to your chatbot:
- Add intent via an AI template
- Create intent without template (current/new AI model)
- Create intent without template (old AI model)
- Add AI Suggestions as an intent
1. Add intent via an AI template
Click on NEW TOPIC in the top right-hand corner of the topic overview and the "New Topic" form will open on the right-hand side. In our example we want to add the topic "Order details".

1. We always start with a sample request, e.g. "Where can I find my last order?"

Now the AI searches for suitable suggestions of intents for you based on your sample user request. For this purpose, the already existing intents of your chatbot are searched, as well as a variety of templates that moinAI provides directly.
The "Found in intents" section helps to avoid creating similar intents.
2. In the templates, the AI finds a suitable template and suggests the intent "Order Details". Click on the intent to get more information.
3. With just one more click on Add intent, you can add the intent to your intent list and your chatbot will then directly understand enquiries about prices and costs.
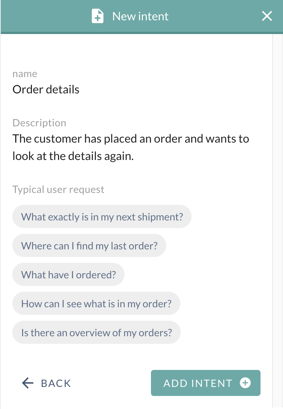
4. You can then edit the answer for the intent, test it in the preview and put it live.
2. Create intent without template (new AI model)
Click on new intent in the intent overview at the top right to open the "New-intent form" on the right-hand side. In this example, the intent "Dutch Oven accessories" is added.
1. Always start at the top by adding an example enquiry into the search bar "sample intent"; e.g. "What accessories are available for the Dutch Oven?"
Based on this enquiry, the AI searches for suitable intent suggestions. It also searches through the chatbot's existing intents and a large number of templates that moinAI provides directly.
A new intent can then be selected at the bottom. This already has a title that matches the example user enquiry entered.

To add the intent without using a template, follow these steps:
1. Name of and scenario of the intent
In this step the name and scenario of the intent can be edited. The name serves as the central description of the intent and the intent itself is shown by this name in the intents-list and the statistics.
The scenario shows the reason why users contact the chatbot.
These fields are mandatory. The more precisely the intent is formulated here, the better the AI can assign enquiries to it.
In the next step, five typical user enquiries on your topic are expected.
2. Typical enquiries
Five typical user queries must be entered. These are checked by the system to see whether they would lead to the newly created intenr in the current setup. Only when all examples are valid can the topic be created in this form.
If an enquiry is unsuitable, an error message appears with a note about which other topic this enquiry matches. The intent can only be created once the unsuitable enquiry has been replaced by a suitable one.

Once the topic has been created, it is immediately available. There is no longer a review process.
3. Create intent without template (old AI model)
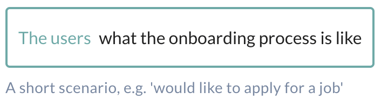
Click on NEW TOPIC in the top right-hand corner of the topic overview and the "New Topic" form will open on the right-hand side. In our example we want to add the topic "Onboarding".
1. We always start with a sample request,
e.g. "What is the onboarding process?"
Now the AI searches for suitable suggestions of intents for you based on your sample user request. For this purpose, the already existing intents of your chatbot are searched, as well as a variety of templates that moinAI provides directly.
The "Found in intents" section helps to avoid creating similar intents.
Now click under "New without template" on New theme without template.
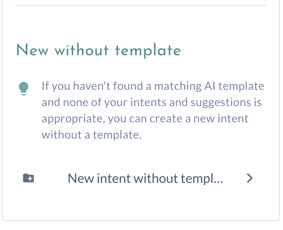
You will now be guided through several steps to create the intent without a template.
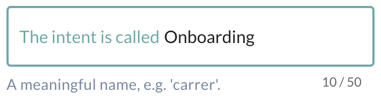
1. The name of the intent
The name is the central designation and appears in the topic overview and in the statistics. The name can be adjusted afterwards. So, in this step, you assign the name.
2. Description of the intent
The description can also be adjusted afterwards. In the intents view, the description appears in an info box when the intent is selected, thus providing a quick overview of the intent without having to go directly to the editing mode for the answer. In this step, you assign the description.
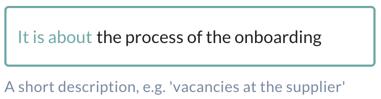
3. Scenario of the intent
The scenario describes what motivates the user to use the chatbot at that moment.
These fields are mandatory to fill in. The more precisely the intent is formulated here, the better the moinAI AI chatbot solution can assign requests to the intent.
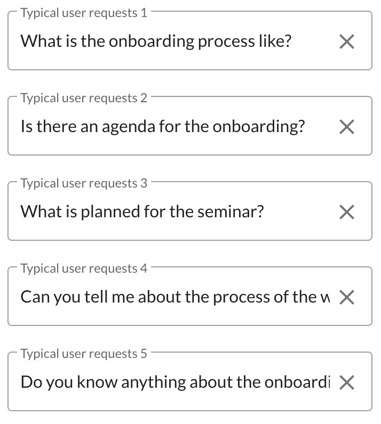
4. 5 typical user requests
When formulating a typical user request, you should use very precise and short requests. The requests must all fit to the intent and should not conflict with other intents.
In the last step you will see a summary of your input. You can then submit the intent.
5. Intent "In Review”
You can also formulate an answer directly to an intent you have created. You can also play out the intent in the preview via the intent bar.
However, the new intent can only be played out live in the chatbot once the moinAI AI experts have checked the intent you have created in order to ensure the quality of the AI and thus the performance of the chatbot.
The following criteria are checked:
- Does the intent already exist or does it overlap thematically with another intent so that the AI cannot separate the intent well
- Are the typical user requests sufficiently diverse to train the intent for the AI?
- The test usually takes until the next working day.
You will then receive feedback from your customer success manager within 1-2 working days if the intent is available or comments why it was not approved regarding the above-mentioned criteria.
3. Add AI Suggestion as an intent
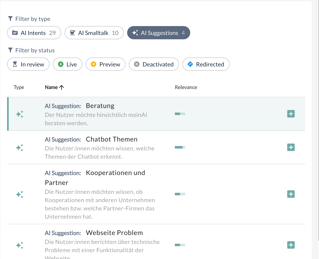
If AI suggestions are available in the moinAI Hub, they can simply be activated and added to the intent list.
For a better overview, filter the topic overview by the AI suggestions.
There are two ways to unlock an AI Suggestion:
1. via the plus button.
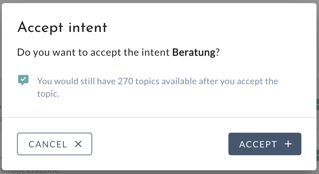
2. via the ACCEPT button in the info box. (It opens when you click on the intent).
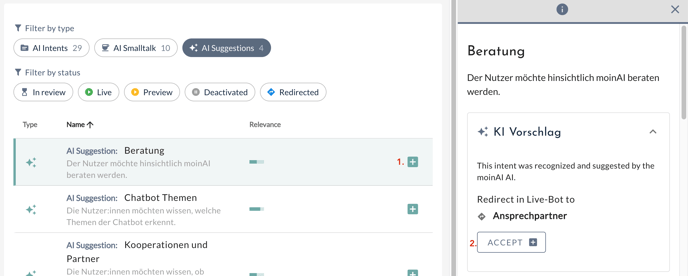
A dialogue box then appears with a note on how many intents are still available and the question whether you really want to accept the intent. Clicking on the Accept button adds the AI Suggestion to the list of intents.
Now an answer can be created, tested in the preview and then be published.